Tuesday, March 27, 2012

My first Quilts, part 2!

My two little lap quilt tops came together in no time! I chose a pale green backing, (which is in fact upcycled from one of my favourite 1000 thread count sheet sets, not very old at all, that had a little tear?!!) and got busy sandwiching the quilt top and the backing fabric around some cotton quilt batting. I used regular safety pins to hold the three layers nice and secure, and I actually found this step to be quite easy, and a little exciting, as I can see the quilts taking shape before my eyes! 
Sandwiched and pinned ready for quilting!

Next came the actual quilting. My new machine, as mentioned in earlier posts, came with many feet, one of which is the quilters foot. I made up a sandwich using scraps and practised quilting in the design of the stiple-stitch, and it was incredibly easy! Full of confidence I just went for it, and it actually worked!!! I had a few little hiccups here and there where I made a jagged movement or touched a line of stitching, but hey... it's all part of the process. I started at the top centre, and worked a one foot wide section from top to bottom, so there are no stops and starts anywhere on the quilt. I continued the foot wide strips until it was all done, so much FUN!!! I knew I would love quilting, and after a year of fiddling around playing with different sewing styles and techniques, I have done it!
Two quilts ready for binding. Quilted be me (!) using free motion quilting stipple stitch style.

I just adore hand made items, and it is such a delight to create something myself. One of these is going to be set aside for my brother's new baby if she is a girl, due in a few weeks (if he's a boy I will need to source some boyish fabric!) or else it will join the other will be the first of many to become my family's snuggly lap quilts, for winters nights on the lounge, or evenings camping in the caravan. Stay tuned for the finished products... 


Monday, March 26, 2012

My first real quilt.

Here we go. Clever new machine... check, some lovely charm square packs... check, white homespun... check, cotton batting... check, YouTube tutorials and Pinterest board inspiration... check! No reason not to get into my first real quilt really, so I bit the proverbial bullet and threw myself into it! Actually I made two at the same time, (because once I had pieced the first quilt top, I freaked a tiny bit about tackling sandwiching just yet and moved onto the second quilt top instead). I have a few charm packs in my stash by now, and the two I picked out first were Moda Terrain, by Kate Spain, and the gorgeous Moda Hideaway, by  Lauren and Jesse Jung.
                                      
                                                                    Images from Google

A sneak peak of the Hideaway quilt top, with homespun border in white.... so far all is good! Stay tuned!
Loving my new sewing machine!

Frilly Apron

The new Machine and I looked at each other for a couple of days. Between my shifts at the hospital, and mothering my children, the best I could manage was to steal glances, taking off the shiny plastic cover and running my fingers over the beautiful new Brother NV200 who has come to live with me as mentioned in my last post. I flicked through the manual in bed at night, marvelling at the cleverness... the stitches, all 80 of them, and wait for it..... the self threading needle! I kid you not (clearly I have a lot to learn!) So the first thing I had to do was to try out this automatic needle threading business. Oh, swoon... I am in love! What to make, what to make... and we had a friend's daughter's 3rd birthday coming up on the weekend, little girls are always fun to create things for. In my growing stash I found some contrasting green and white rose bud fabric and I knew straight away I should have a go at one of those darling little girl frilly aprons I had pinned to Pinterest in the recent weeks. Friday night I would be home with the children, the party wasn't until Saturday morning, I can do this... brilliant idea! Interestingly, I had some unexpected guests pop in on Friday evening and they stayed for dinner of course, so I was up early on Saturday morning to get that gift made ready for the 10.30am party! Thanks to my clever new machine, NOT A PROBLEM!!!!   


Just over an hour after I started, I had completed my first project on my new machine, quite delighted I am! No pattern, just cut and sew... in fact, the apron just came together really easily. Happy days! My darling daughter happily models the finished product below...
I'll say it again, I was delighted with the end product! What I was not prepared for was the three year old birthday girl's expression when she opened the gift and put it on, she really, really loved it! Wow... doesn't that feel amazing!   
Some days are simply awesome. 

Sunday, March 25, 2012

A Play Mat

I've been toying with the idea of becoming brave with my machine and actually getting myself properly quilting. My Pinterest page is overflowing with inspiration, and I have collected many fabrics ready to go. My machine was very basic, a Bernina Bernette, (I have since updated... more on that later) and I wanted to experiment with sewing through layers of sandwiched fabric. I bought a walking foot and decided to make a play mat for a friend's bub. I purchased a panel of animal fabric, some backing and some cheap polyester batting and set to work.
End result was a very functional floor play mat for a little baby boy, soft and comfy... but I decided my machine was not up to the job for me and my further quilting endevours. It did the job sure, but it was a very basic 'beginners' machine which has seen me through the last 7 years, through making curtains, children's library and chair bags, altering countless items of clothing, and even creating some too.
 
Image from google 

 I've been eyeing off some fine machines for quite a while, and the more I learned about them, the more I wished for something a little more, well, clever. Behold, the Brother Innovis NV200 Quilter's Edition, with 80 stitches, many, many bobbins and so many different feet, including all one needs for quilting.
 
Image from google
I figured that now I am working, (no longer a poor student) I could afford to splurge a little, and I was lucky enough to find this little beauty for a steal on eBay. Only used twice, purchased new by an older lady, who just found the computerised machine a bit beyond her. Only one bobbin had been wound, and it was like brand new! Yay!!! I can not get over the difference to sit at this machine and sew. It is just so lovely to use and I can't wait to get busy making some of the things I have pinned to my pinterest haha! 

Monday, March 5, 2012

Sitting Mats

As I have mentioned, two of my three children suffer quite severe eczema. One of their biggest triggers is their allergy to dust mites, (which actually is an allergy to dust mite poo if we are going to be precise.) The problem with this allergy is that it is impossible to avoid entirely, as dust mites are impossible to remove from the human environment, seeing as their staple diet is shed human skin cells! Sure we can minimise exposure with strategies such as using appropriate bedding protection, minimising carpets, washing very regularly, drying linen in the sunshine, and regularly using a vacuum cleaner equipped with a hospital grade HEPA filter such as my gorgeous Dyson Vac. But what to do when Kindergarten starts and our little guy has to spend a lot of time on the floor during class time, ie "floor time". I didn't really like the idea of having him always having to sit on a chair while the others all sat on the floor during news, play, games, reading, groups or floor time. I also was concerned as I felt it would separate him from the class... well, then there was the similarity with the "thinking chair" which is a place the children go to sit when they play up!

  
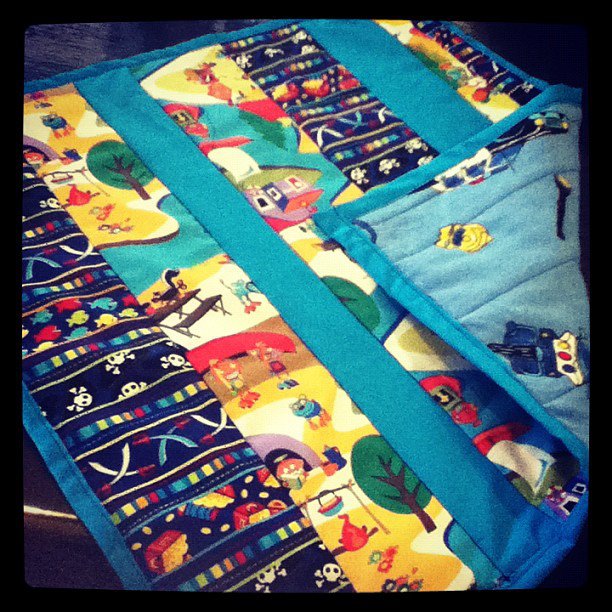
So, I came up with the idea of making him a mini quilt that he could take to school to sit on, a 'sitting mat' as he calls it. I actually made two and we have been rotating them every 4 or 5 days allowing me time to wash and dry them to keep them friendly on his skin. Cotton strips, using the quilt-as-you-go method, with soft flannel backing, one in dinosaur print and the other in police print so he can tell which one is to bring home to wash and which one is fresh. 

 These were my 1st quilt-as-you-go projects, and I am quite chuffed with how they turned out, so fast and effective! Happy days!

Sunday, March 4, 2012

Birthday Boy

With thanks to Pinterest, this is what I came up with for my little Lego-mad boy's 5th birthday....
LEGO CAKE!!!! 

A Chair bag!

So, it's been a while... again! But I have been a little busy on the creative front lately, for a change, I just wanted to share a few of my little projects with you as I've been on a bit of a roll! (it's amazing how the creative juices begin to flow when one is free and has something called 'time' after four and a half years at
Uni!).
A nice place to be, back behind the sewing machine....

My big school boy loves his chair bag, and especially loves the pirate pocket for his little bits and pieces. Happy days!